
 Mobile Generator


How to Build a Reliable Off-Grid Solar Power Solution
Imagine living in a place where the power never goes out, no matter what happens to the grid. That’s the beauty of a solar off-grid power solution. It’s a system that lets you generate electricity using the sun and store it for later use, without relying on traditional power sources. You’re in charge of your own energy, and that feels pretty amazing.
Reliability is the backbone of any off-grid system. Without it, you risk losing power when you need it most. Whether it’s keeping your fridge running or powering your lights at night, a dependable setup ensures your daily life stays comfortable and stress-free.
Plus, going off-grid isn’t just practical—it’s good for the planet. You reduce your carbon footprint and embrace energy independence. It’s a win-win that makes you part of a sustainable future.
Key Takeaways
- Learn the main parts of an off-grid solar system: solar panels, batteries, inverters, and charge controllers. Each part is important for steady energy.
- Figure out how much energy you use. Write down all devices and their power use to know your daily needs. This helps pick the right size for panels and batteries.
- Pick solar panels that fit your space and budget. Monocrystalline panels work well but cost more. Polycrystalline panels are cheaper but less efficient.
- Take care of your system often. Clean the panels and check connections to keep them working well. Plan these tasks to avoid problems.
- Think about getting a backup generator. It gives extra power on cloudy days or when you need more energy.
Essential Components of a Solar Off-Grid Power Solution
When it comes to building a reliable solar off-grid power solution, understanding its key components is essential. Each part plays a unique role in ensuring your system runs smoothly and meets your energy needs. Let’s dive into the three most critical elements: solar panels, batteries, and inverters.
Solar Panels: Choosing the right type and capacity
Solar panels are the heart of your system. They capture sunlight and convert it into electricity. Choosing the right type and capacity is crucial for maximizing efficiency.
There are three main types of solar panels:
- Monocrystalline: These panels are highly efficient and take up less space. They’re perfect if you have limited installation area.
- Polycrystalline: Slightly less efficient but more affordable. They’re a good option if you’re on a budget.
- Thin-film: Lightweight and flexible, but they require more space. These work well for portable setups or unconventional installations.
To determine the capacity you need, think about your daily energy usage. If you use 5 kWh per day, you’ll need panels that can generate at least that much energy. Keep in mind that weather conditions and sunlight hours affect performance.
Tip: Always check the efficiency rating and warranty of the panels before buying. A higher efficiency rating means better performance, even on cloudy days.
Batteries: Selecting efficient and durable storage options
Batteries store the energy your solar panels generate. Without them, you wouldn’t have power at night or during cloudy weather. Picking the right batteries ensures your solar off-grid power solution stays reliable.
Here are the most common types of batteries:
| Battery Type | Pros | Cons |
|---|---|---|
| Lead-acid | Affordable and widely available | Shorter lifespan and heavier |
| Lithium-ion | Long lifespan and lightweight | Higher upfront cost |
| Saltwater | Eco-friendly and non-toxic | Limited availability |
Lithium-ion batteries are often the best choice for off-grid systems. They last longer, charge faster, and require less maintenance. However, if you’re looking for a budget-friendly option, lead-acid batteries can still get the job done.
Note: Make sure your battery capacity matches your energy needs. If you use 5 kWh per day, aim for batteries that can store at least 6-7 kWh to account for inefficiencies.
Inverters: Converting DC to AC for household use
Solar panels and batteries produce direct current (DC) electricity, but most household appliances run on alternating current (AC). That’s where inverters come in. They convert DC into AC so you can power your devices.
There are three main types of inverters:
- Pure Sine Wave Inverters: These provide clean and stable power, ideal for sensitive electronics like laptops and TVs.
- Modified sine wave inverters: Less expensive but not suitable for all devices. They work well for basic appliances like lights and fans.
- Hybrid inverters: These combine the features of a solar inverter and a Battery Inverter, offering more flexibility.
When choosing an inverter, consider its wattage capacity. If your appliances require 3,000 watts during peak usage, pick an inverter with a slightly higher capacity to avoid overloading.
Tip: Look for inverters with built-in safety features like surge protection and overload alarms. These can prevent damage to your system and appliances.
Charge Controllers: Regulating power flow to batteries
Charge controllers are like the traffic cops of your solar off-grid power solution. They manage the flow of electricity between your solar panels and batteries, ensuring everything runs smoothly. Without them, your batteries could overcharge or discharge too much, which can shorten their lifespan.
There are two main types of charge controllers:
- PWM (Pulse Width Modulation): These are simpler and more affordable. They work well for smaller systems but aren’t as efficient.
- MPPT (Maximum Power Point Tracking): These are more advanced and can extract more energy from your solar panels. They’re ideal for larger systems where efficiency matters.
When choosing a charge controller, pay attention to its voltage and current ratings. If your solar panels produce 24 volts and your batteries operate at 12 volts, you’ll need a controller that can handle the conversion. Similarly, make sure the controller can handle the maximum current your panels generate.
Tip: Look for charge controllers with built-in safety features like temperature sensors and overload protection. These features can help prevent damage to your system and keep it running reliably.
Wiring and Accessories: Ensuring safe and efficient connections
Wiring and accessories might not seem exciting, but they’re the backbone of your solar off-grid power solution. Proper wiring ensures electricity flows safely and efficiently between all components.
Here’s what you’ll need:
- Cables: Use high-quality, weather-resistant cables to connect your solar panels, batteries, and inverter. Thicker cables reduce energy loss.
- Connectors: MC4 connectors are popular for solar setups. They’re easy to use and provide secure connections.
- Fuses and Breakers: These protect your system from electrical overloads. Place them between your panels, batteries, and inverter for maximum safety.
- Grounding Equipment: Grounding prevents electrical shocks and protects your system during lightning strikes.
When planning your wiring layout, keep it simple and organized. Label each wire to avoid confusion during installation or maintenance.
Note: Always follow local electrical codes and regulations when setting up your wiring. If you’re unsure, consult a professional electrician to ensure everything is safe and compliant.
Designing a Solar Off-Grid Power Solution
Designing your solar off-grid power solution starts with careful planning. You need to figure out how much energy you use, how many solar panels you’ll need, and the right battery size to store that energy. Let’s break it down step by step.
Calculating Energy Needs: Estimating daily and peak usage
The first step is to calculate how much electricity you use every day. This helps you understand the size of the system you’ll need. Start by listing all the devices and appliances you plan to power. For each one, note its wattage and how many hours you use it daily.
Here’s a simple formula to calculate energy usage for each device:Wattage × Hours Used Per Day = Daily Energy Consumption (in watt-hours)
For example, if you have a 100-watt lightbulb that runs for 5 hours a day:100 watts × 5 hours = 500 watt-hours (or 0.5 kWh)
Add up the daily energy consumption for all your devices to get your total energy needs. Don’t forget to account for peak usage. This is the time of day when you’re using the most electricity, like when multiple appliances are running at once. Knowing your peak usage ensures your system can handle the load without shutting down.
Tip: Use an energy calculator or a smart plug with energy monitoring to make this process easier.
Sizing Solar Panels: Determining the required wattage
Once you know your energy needs, it’s time to figure out how many solar panels you’ll need. Solar panels generate electricity based on their wattage and the amount of sunlight they receive. To size your panels, divide your daily energy consumption by the average sunlight hours in your area.
Here’s the formula:Daily Energy Needs ÷ Sunlight Hours = Required Solar Panel Wattage
For example, if you need 5,000 watt-hours (5 kWh) per day and your area gets 5 hours of sunlight:5,000 ÷ 5 = 1,000 watts
This means you’ll need solar panels with a total capacity of 1,000 watts. If each panel is rated at 250 watts, you’ll need four panels.
Keep in mind that weather conditions and shading can reduce panel efficiency. It’s a good idea to add a 20-30% buffer to your calculations to ensure your system performs well even on cloudy days.
Note: Check the specifications of your solar panels, including their efficiency and warranty, to make sure they meet your needs.
Sizing Batteries: Ensuring sufficient energy storage
Batteries are essential for storing the energy your solar panels generate. To size your batteries, you’ll need to consider your daily energy needs and how many days of backup power you want. Most people aim for 1-3 days of backup to cover cloudy weather or unexpected energy spikes.
Here’s the formula to calculate battery capacity:Daily Energy Needs × Backup Days ÷ Battery Voltage = Required Battery Capacity (in amp-hours)
For example, if you need 5,000 watt-hours per day, want 2 days of backup, and use 12-volt batteries:5,000 × 2 ÷ 12 = 833 amp-hours
You’ll need batteries with a total capacity of 833 amp-hours. If each battery has a capacity of 200 amp-hours, you’ll need at least five batteries.
Tip: Choose batteries with a slightly higher capacity than your calculations to account for inefficiencies and energy loss during charging and discharging.
By carefully calculating your energy needs, sizing your solar panels, and selecting the right batteries, you’ll create a solar off-grid power solution that’s reliable and efficient.
Selecting Inverters and Charge Controllers
Choosing the right inverters and charge controllers is a critical step in building your solar off-grid power solution. These components ensure your system operates efficiently and safely, so let’s break it down.
Inverters: What to Look For
Inverters convert the direct current (DC) electricity from your solar panels and batteries into alternating current (AC) electricity for your appliances. Picking the right one depends on your energy needs and the type of devices you plan to power.
Here’s what you should consider:
- Wattage Capacity: Add up the wattage of all the devices you’ll use at the same time. Choose an inverter with a capacity slightly higher than this total to avoid overloading.
- Type of Inverter:
- Pure Sine Wave: Best for sensitive electronics like laptops and medical equipment. These provide clean, stable power.
- Modified Sine Wave: A budget-friendly option for basic appliances like lights and fans.
- Hybrid Inverters: These combine solar and battery inverters, offering flexibility for future upgrades.
Tip: Look for inverters with built-in safety features like surge protection and automatic shutoff. These features can protect your appliances and extend the life of your system.
Charge Controllers: Keeping Your Batteries Healthy
Charge controllers regulate the flow of electricity from your solar panels to your batteries. Without one, your batteries could overcharge or discharge too much, leading to damage.
There are two main types of charge controllers:
| Type | Efficiency | Best For |
|---|---|---|
| PWM (Pulse Width Modulation) | Moderate | Small, budget-friendly systems |
| MPPT (Maximum Power Point Tracking) | High | Larger systems needing efficiency |
MPPT controllers are more expensive but worth it if you want to maximize energy production. They’re especially useful in areas with variable sunlight.
When selecting a charge controller, check its voltage and current ratings. Make sure it matches the specifications of your solar panels and batteries.
Note: Some advanced charge controllers come with monitoring apps, so you can track your system’s performance right from your phone.
Planning the Wiring Layout: Creating a Detailed Diagram
A well-planned wiring layout is the backbone of a safe and efficient solar off-grid power solution. It ensures all components work together seamlessly and minimizes the risk of electrical issues.
Steps to Plan Your Wiring Layout
- Map Out Your Components: Start by sketching a diagram of your system. Include the solar panels, batteries, inverter, charge controller, and any additional accessories like fuses and breakers.
- Determine Wire Lengths: Measure the distances between components. Keep wires as short as possible to reduce energy loss.
- Choose the Right Wire Gauge: Thicker wires handle more current and reduce resistance. Use a wire gauge chart to select the right size based on your system’s voltage and current.
- Add Safety Features: Include fuses, breakers, and grounding equipment in your layout. These protect your system from overloads and electrical faults.
Example Wiring Diagram
Here’s a simplified example of how your wiring layout might look:
[Solar Panels] ----> [Charge Controller] ----> [Batteries] ----> [Inverter] ----> [Appliances] Each arrow represents a connection, and you’ll need to include fuses and breakers at key points for safety.
Tip: Label each wire in your system. This makes installation and troubleshooting much easier.
Final Checks
Before you start wiring, double-check your diagram for accuracy. Make sure all components are compatible and that you’ve accounted for safety features. If you’re unsure, consult a professional electrician to review your plan.
Reminder: Always follow local electrical codes and regulations. Safety should be your top priority.
Installing Your Solar Off-Grid Power Solution
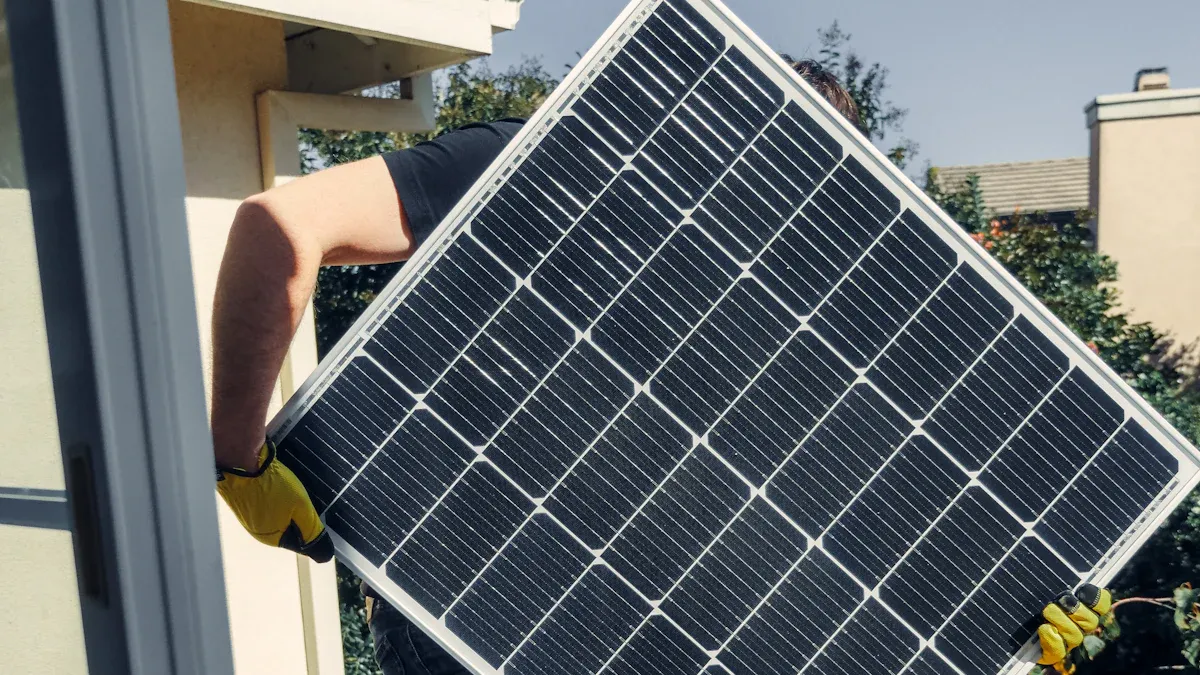
Mounting Solar Panels: Roof vs. ground installation
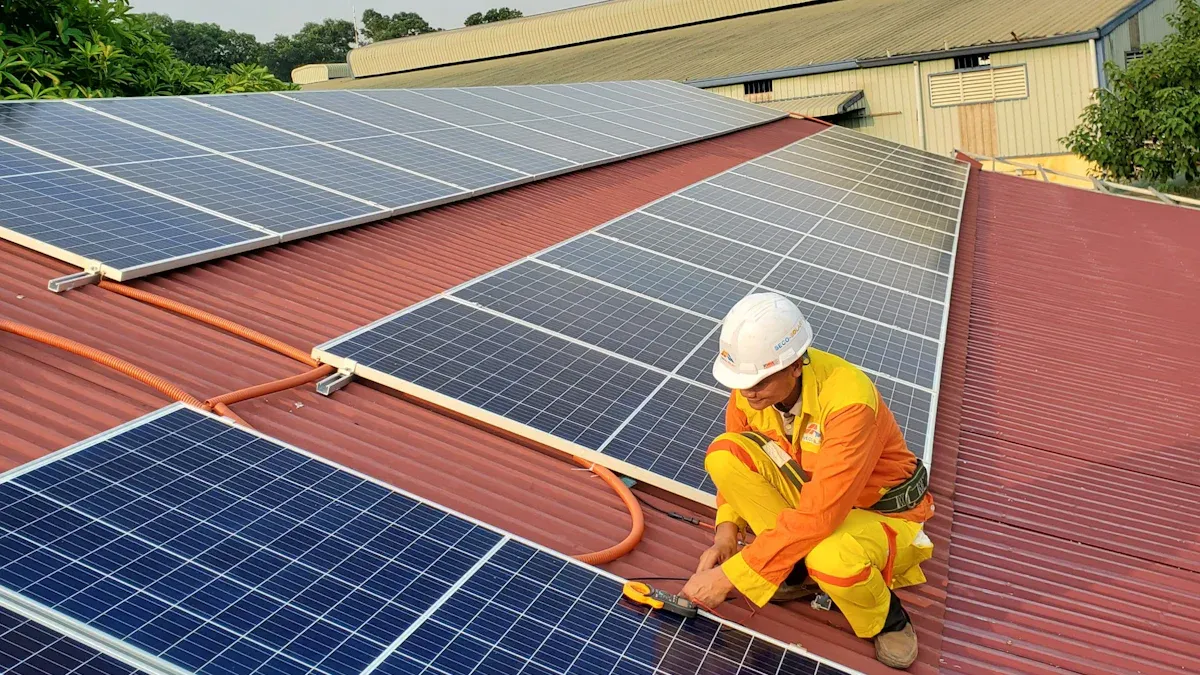
Mounting your solar panels is one of the first steps in setting up your solar off-grid power solution. You have two main options: roof-mounted or ground-mounted panels. Each has its pros and cons, so it depends on your space and needs.
Roof-mounted panels save space and keep your yard clear. They work well if your roof gets plenty of sunlight and has the right angle. However, installation can be tricky, especially if your roof is steep or shaded. You’ll also need to clean and maintain them, which might require climbing up.
Ground-mounted panels are easier to install and maintain. You can place them in the sunniest spot on your property and adjust their angle for maximum efficiency. But they take up space and may need extra protection from animals or kids.
Tip: Use a solar pathfinder or similar tool to find the best location for your panels. This ensures they get the most sunlight throughout the day.
Connecting Batteries and Charge Controllers
Once your panels are mounted, it’s time to connect your batteries and charge controller. Start by wiring the batteries together. Follow the manufacturer’s instructions to connect them in series or parallel, depending on your system’s voltage requirements.
Next, connect the charge controller to the batteries. This device regulates the energy flow from your panels to the batteries, preventing overcharging or deep discharging. Use the correct wire gauge and secure all connections tightly. Double-check the polarity to avoid damaging your equipment.
Note: Always turn off the charge controller before making any connections. This prevents accidental short circuits.
Installing the Inverter: Placement and wiring setup
The inverter is the final piece of the puzzle. Place it in a cool, dry, and well-ventilated area. Avoid direct sunlight or areas prone to moisture. Mount it securely on a wall or a sturdy surface.
Connect the inverter to your battery bank using the appropriate cables. Then, wire it to your home’s electrical system or directly to your appliances. Make sure the inverter’s capacity matches your energy needs to avoid overloading.
Reminder: Test the inverter after installation to ensure it’s converting DC to AC properly. A multimeter can help you verify the output voltage.
Wiring the System: Ensuring proper connections
Wiring your solar off-grid system might sound intimidating, but it’s easier than you think when you follow a clear plan. Proper connections are key to keeping your system safe and efficient. Let’s break it down step by step.
-
Start with the right tools and materials: Gather high-quality, weather-resistant cables, connectors, fuses, and breakers. Make sure you have the correct wire gauge for your system. Thicker wires handle more current and reduce energy loss.
-
Connect the solar panels to the charge controller: Use MC4 connectors for a secure and weatherproof connection. Double-check the polarity—positive to positive and negative to negative. Reversing these can damage your equipment.
-
Wire the charge controller to the batteries: Use the appropriate cables and follow the manufacturer’s instructions. Add a fuse or breaker between the controller and the batteries for extra safety.
-
Link the batteries to the inverter: Connect the battery bank to the inverter using heavy-duty cables. Again, check the polarity to avoid short circuits.
-
Ground your system: Grounding protects your system from electrical shocks and lightning strikes. Use a grounding rod and connect it to your system’s grounding terminal.
Tip: Label each wire as you go. This makes troubleshooting and future upgrades much easier.
Before moving on, inspect all connections. Look for loose wires or exposed metal. A small mistake here can lead to big problems later.
Testing the Installation: Verifying functionality and safety
Once everything is wired, it’s time to test your system. This step ensures everything works as it should and keeps you safe.
-
Check the connections: Go over every wire and connector. Make sure they’re tight and secure. Loose connections can cause overheating or energy loss.
-
Turn on the charge controller: Power up the charge controller first. It should display the voltage and current from your solar panels. If it doesn’t, recheck the panel connections.
-
Test the batteries: Use a multimeter to measure the battery voltage. It should match the expected level. If it’s too low or too high, there might be an issue with the charge controller.
-
Power up the inverter: Turn on the inverter and check its output. Use a multimeter to confirm it’s producing the correct AC voltage for your appliances.
-
Run a trial load: Plug in a small appliance, like a lamp or fan, to test the system. If it works without issues, you’re good to go!
Note: If something doesn’t work, don’t panic. Turn off the system and troubleshoot step by step. Common issues include reversed polarity or loose connections.
Testing ensures your solar off-grid system is ready to provide reliable power. Once everything checks out, you can start enjoying your energy independence! 😊
Maintaining and Upgrading Your Solar Off-Grid Power Solution
Keeping your solar off-grid power solution in top shape doesn’t have to be complicated. With regular maintenance, quick troubleshooting, and smart upgrades, you can ensure your system stays reliable for years to come. Let’s explore how you can do this.
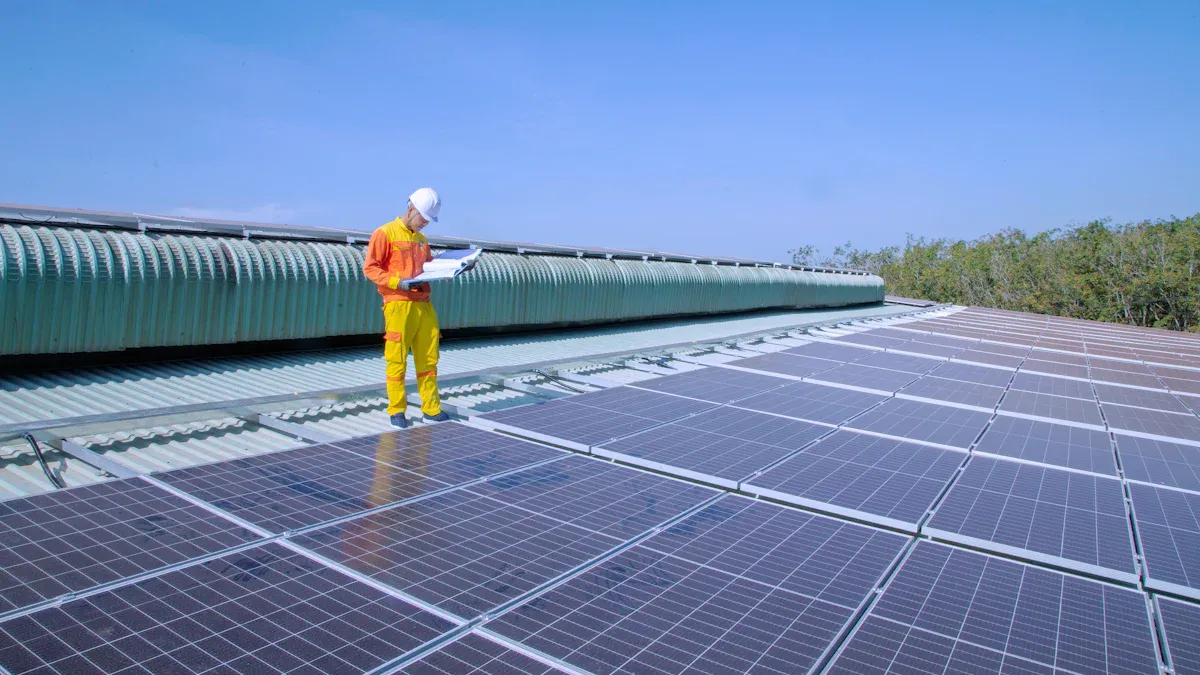
Regular Maintenance: Cleaning, inspections, and performance checks
A little upkeep goes a long way. Start by cleaning your solar panels every few months. Dust, dirt, and bird droppings can block sunlight and reduce efficiency. Use a soft brush or a hose with clean water to gently remove debris. Avoid harsh chemicals—they can damage the panels.
Inspect your system regularly. Check for loose wires, corrosion, or signs of wear on connectors. Look at your batteries too. Ensure they’re not overheating or leaking. If you spot anything unusual, address it immediately.
Performance checks are just as important. Monitor your system’s output using the charge controller or inverter display. If the numbers seem off, it might be time to investigate further.
Tip: Schedule maintenance tasks on your calendar. This helps you stay consistent and prevents small issues from becoming big problems.
Troubleshooting Issues: Identifying and resolving common problems
Even the best systems can run into trouble. If your system isn’t performing well, start by checking the basics. Are the panels clean and positioned correctly? Are all connections secure? Sometimes, a simple fix can solve the issue.
For battery problems, measure the voltage. If it’s too low, your batteries might not be charging properly. This could point to an issue with the charge controller or wiring. Inverter not working? Double-check the input and output connections.
If you’re stuck, don’t hesitate to consult the user manuals or reach out to a professional. It’s better to get expert help than risk damaging your system.
Note: Keep a troubleshooting log. Write down what went wrong and how you fixed it. This can save you time if the issue happens again.
Upgrading Components: Scaling the system for future needs
As your energy needs grow, your system should grow too. Upgrading components is a great way to scale your solar off-grid power solution. Start with your solar panels. Adding more panels increases energy production, especially if you’ve noticed your current setup struggling to meet demand.
Next, consider your batteries. If you’re running out of stored energy too quickly, upgrading to higher-capacity batteries or adding more to your bank can help. Lithium-ion batteries are a great choice for long-term reliability.
Finally, look at your inverter and charge controller. If you’re adding more panels or batteries, make sure these components can handle the increased load. Upgrading to a hybrid inverter or an MPPT charge controller can boost efficiency and flexibility.
Tip: Plan upgrades with the future in mind. Choose components that are compatible with your current system and allow for easy expansion.
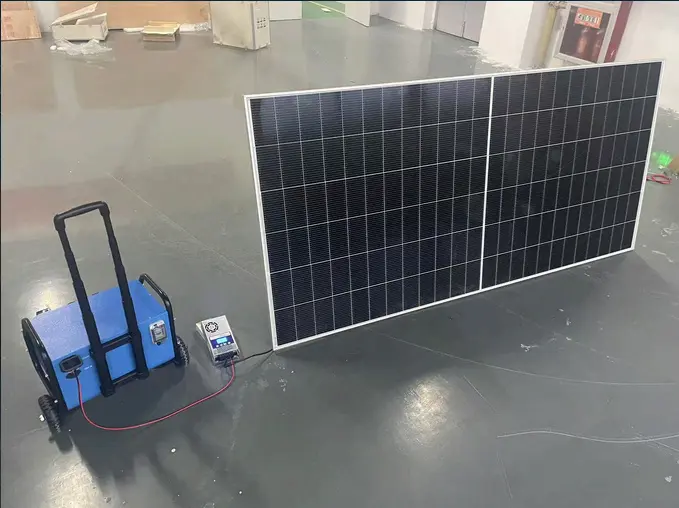
Backup Power Options: Adding generators for reliability
Even the most Reliable Solar Off-Grid Systems can face challenges. Cloudy weather, unexpected energy spikes, or prolonged power usage might leave you needing extra support. That’s where backup generators come in. They act as your safety net, ensuring you always have power when your solar system can’t keep up.
Why Add a Generator?
Generators provide a dependable backup power source. They kick in when your batteries run low or during extended periods of low sunlight. This ensures your essential appliances, like refrigerators or medical devices, stay powered. Plus, they’re great for emergencies or when you need extra energy for special occasions.
- Add a backup mobile solar energy storage generator to charge your backup generator when your off-grid solar power generation system is in operation. At night, your backup solar energy storage generator can supply power to you.
Tip: Choose a generator with an automatic transfer switch. This feature allows the generator to start automatically when your batteries run low.
Sizing Your Generator
To pick the right generator, calculate your peak energy needs. Add up the wattage of all the devices you’d run during an outage. Then, choose a generator with a slightly higher capacity to handle the load comfortably.
Adding a generator to your solar off-grid system gives you peace of mind. It ensures you’re prepared for any situation, keeping your home powered no matter what. 😊
Building a solar off-grid power solution might seem like a big project, but you’ve got this! Start by designing a system that fits your energy needs. Install it carefully, and don’t skip regular maintenance to keep everything running smoothly. Each step matters, from choosing the right components to testing your setup.
Ready to take control of your energy? It’s time to embrace independence and sustainability. Start small or go all in—either way, you’re creating a brighter, greener future. 🌞
FAQ
What size solar system do I need for my home?
It depends on how much electricity you use daily. Start by calculating your energy needs in kilowatt-hours (kWh). Then, consider your location’s sunlight hours. A professional installer or online calculator can help you figure out the exact size.
Tip: Add a 20% buffer to account for cloudy days or future energy needs.
How long do solar batteries last?
Most solar batteries last 5 to 15 years, depending on the type and usage. Lithium-ion batteries usually last longer than lead-acid ones. Regular maintenance, like keeping them clean and charged, can extend their lifespan.
Note: Check the warranty when buying batteries for added peace of mind.
Can I run my entire house on solar power?
Yes, you can! But you’ll need a system large enough to meet your energy needs. This includes enough solar panels, batteries, and an inverter. It’s also smart to have a backup generator for emergencies.
Reminder: Energy-efficient appliances can reduce your system size and cost.
Do solar panels work during cloudy weather?
Yes, solar panels still work on cloudy days, but they produce less energy. Efficiency drops to about 10-25% of what they generate on sunny days. Adding more panels or batteries can help offset this.
Tip: Choose high-efficiency panels if you live in a cloudy area.
Is it expensive to maintain a solar off-grid system?
Not really! Maintenance mostly involves cleaning panels and checking connections. Batteries may need occasional inspections. Costs are minimal compared to the savings on electricity bills.
Emoji Check: 🌞 A little care keeps your system running smoothly for years!